This feature allows you to upload a list of users that you do not want to contact. This means, that even if they fall within a search you upload into LeadGiant or are added to the campaign, the system will not send automated tasks to the profiles and those leads will be paused. In order for them not to be blacklisted anymore, you would need to resume them in the campaign.
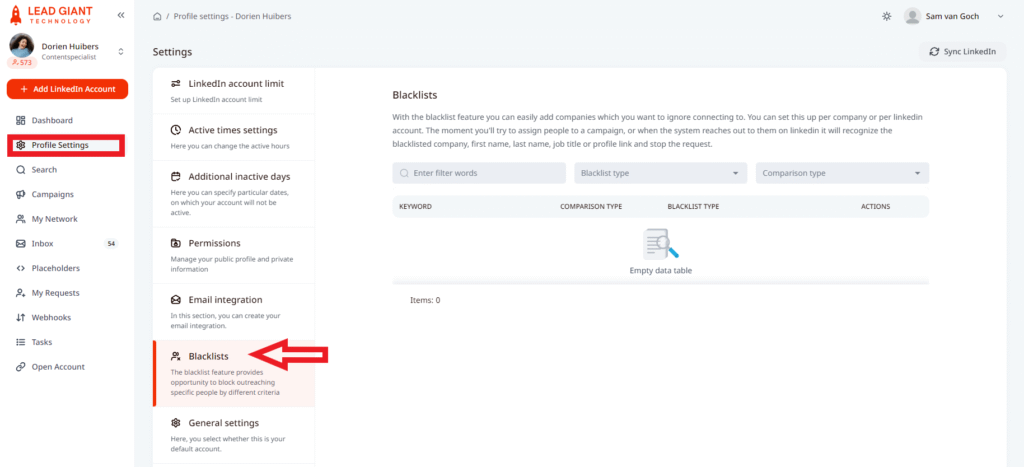
In order to reach the blacklist option, you need to go to Profile Settings from the dashboard and click on the Blacklist option
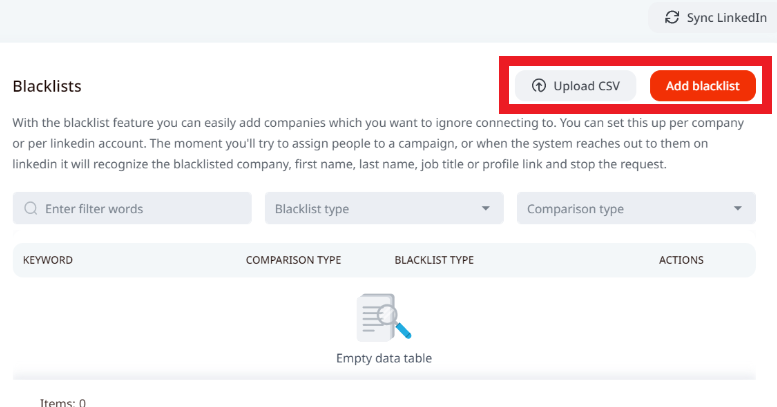
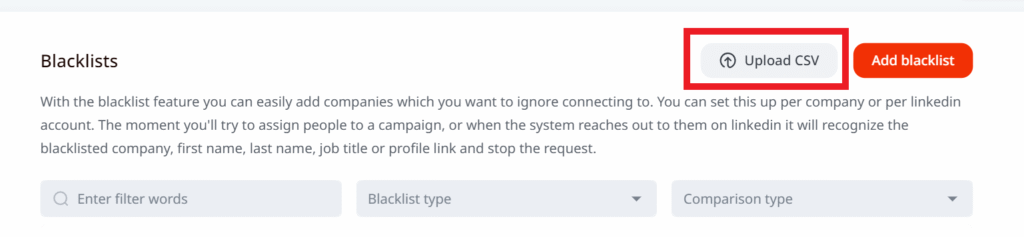
In the Blacklist section, you will see two options to add a blacklist to the account, you can either manually upload a blacklist by pressing on Add blacklist button or upload it via CSV file by clicking on Upload CSV
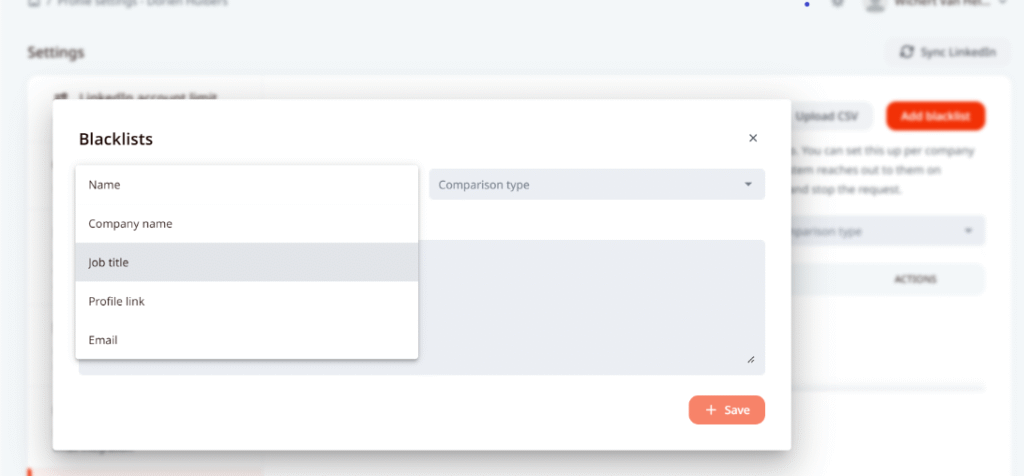
You have the option to blacklist:
- Names
- Company names
- Job titles
- Profile links
- Emails
This means if you blacklist ‘John Smith’ and a John Smith falls within your search, they will not be assigned to a campaign.
If you blacklist the company ‘Google’, and a user currently works at Google on LinkedIn, they will not be assigned to a campaign.
Keep in mind that: You can choose between four types of fields – Exact match (there you write the specific and complete words which you want to avoid), Contains (here you can write only a specific word which will lead to LeadGiant avoiding people or companies whose name contains this word), Starts with and Ends with.
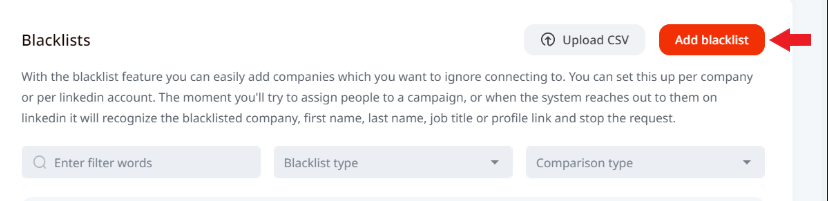
To manually upload a list, please follow the steps below:
- Click on the button labeled Add blacklist
2. Choose the Blacklist type and Comparison type from the dropdown menu
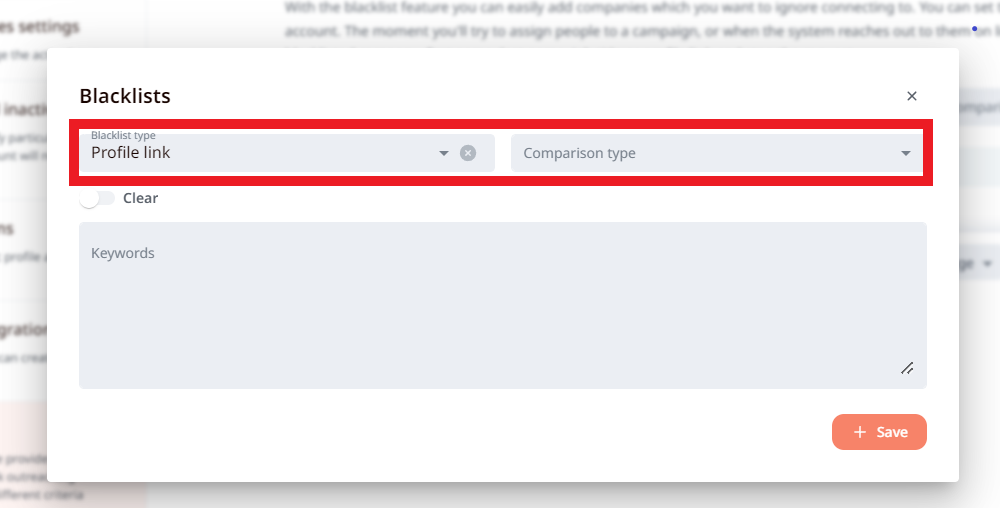
3. (SKIP THIS STEP IF YOU ARE ADDING A NEW BLACKLIST) You will also notice a Clear toggle, this can be used if you wish to clear (delete) the already added blacklist. If that is what you wish to do – turn the Clear option on if you would like to clear the previously added blacklist that fits the selected blacklist type (profile link) and comparison type (exact). In this case, the Keywords section would have to be left empty. Now if you save the changes all the previously uploaded exact-match profile links will be deleted from the blacklist section and won’t be blacklisted anymore
Type in the Keywords in the text box (profile links for example), separating them with commas
4. Finally, click on the Save Changes button
5. Once it is done, added profile link will appear in the blacklist

In case you wish to upload a blacklist via CSV file instead, please follow the steps below:
- Click on the Upload CSV button
2. Choose the Comparison type
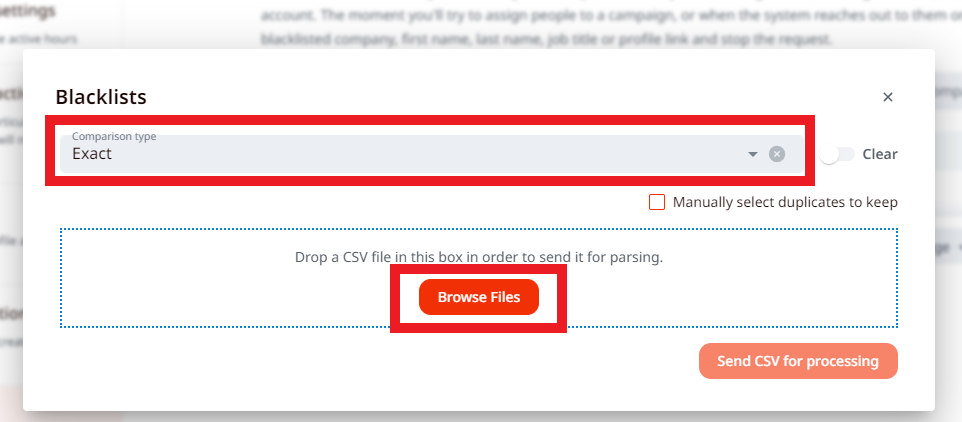
3. (SKIP THIS STEP IF YOU ARE ADDING A NEW BLACKLIST) Clear toggle can be used if you wish to clear (delete) the already added blacklist. To do this, you would need to select the comparison type, turn on the clear toggle, add a CSV file with the blacklist you wish to be removed, and press Send CSV for processing
4. Click on Browse Files to select the CSV file you wish to use
5. Choose the CSV file from the device you wish to use in the blacklist
6. Map only one chosen field to the correct column (for example profile link) and skip all the other columns (just like below)
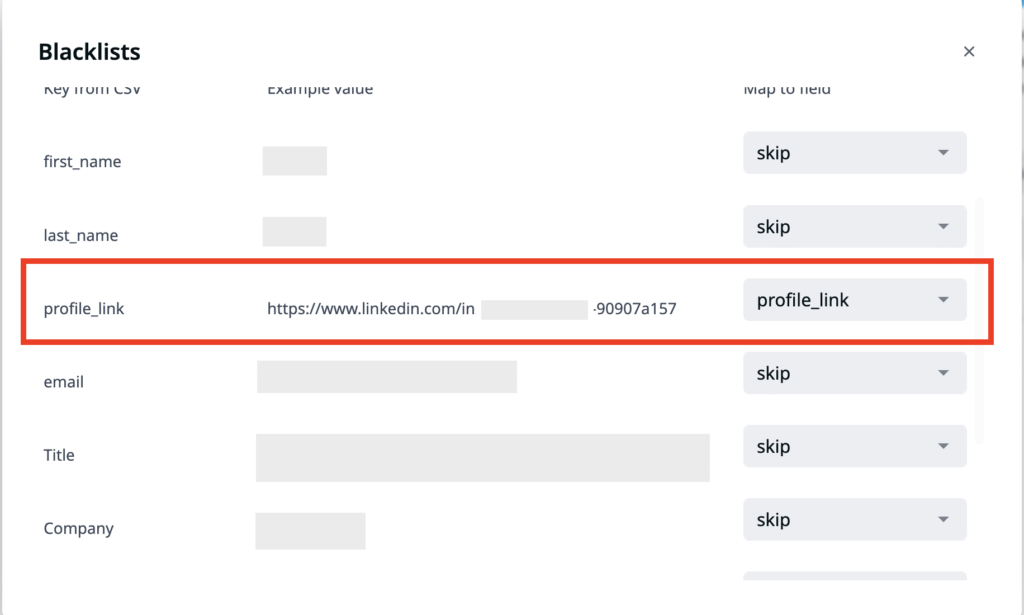
7. Once it is done, scroll all the way down and press on Send CSV for processing, when it is processed, blacklisted profile links will appear in your blacklist page.
Above the blacklist field, you are able to filter it on three criteria: filter words, blacklist type, and comparison type.

Also, you are able to delete one specific profile link from the blacklist for example by pressing on the Delete icon next to it.