If you wish to connect your email to LeadGiant to start automating email outreach you can do so by following this guide. Once the email is integrated, emails can be sent with a builder campaign. Please learn more about it and how to set it up here.
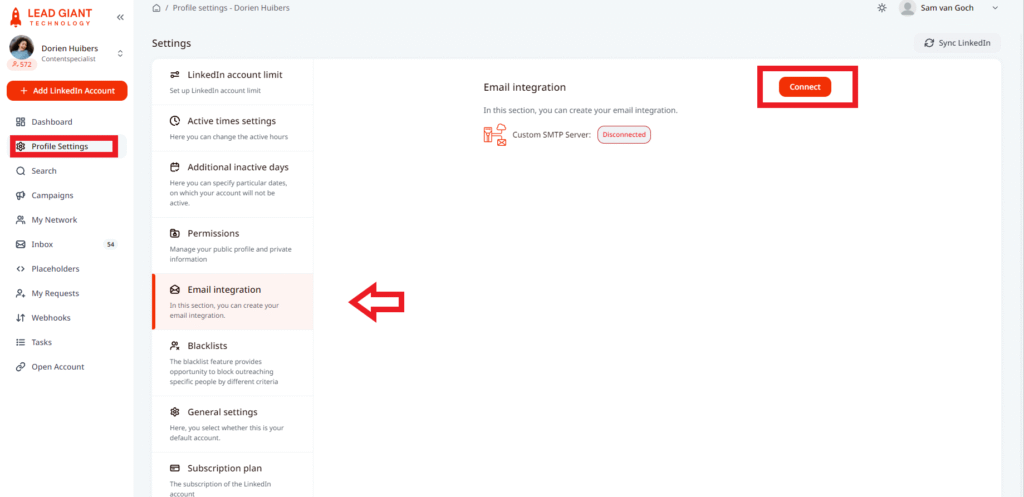
To get started with your email integration, go to your Profile settings and press on Email Integration then click on Connect
Select connection type depending on your email account provider
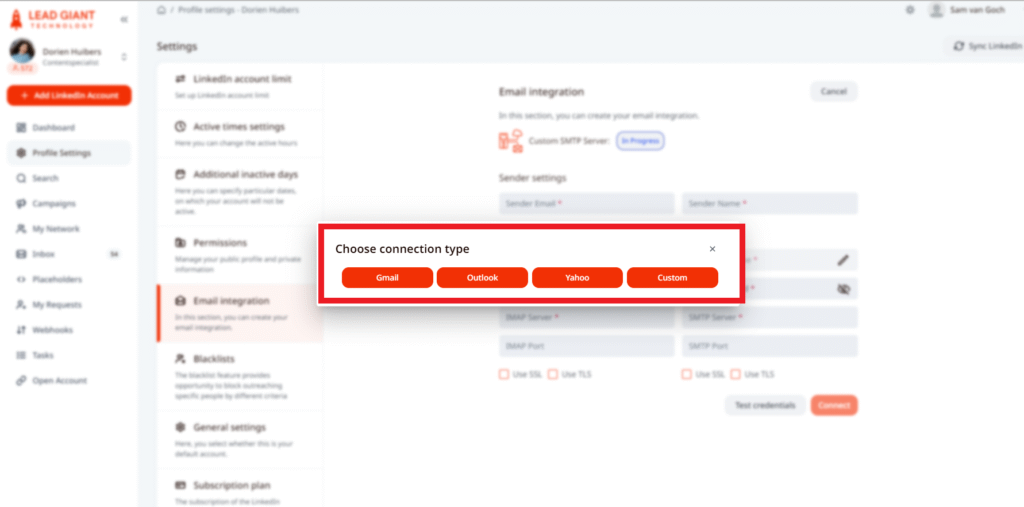
👉 Gmail integration
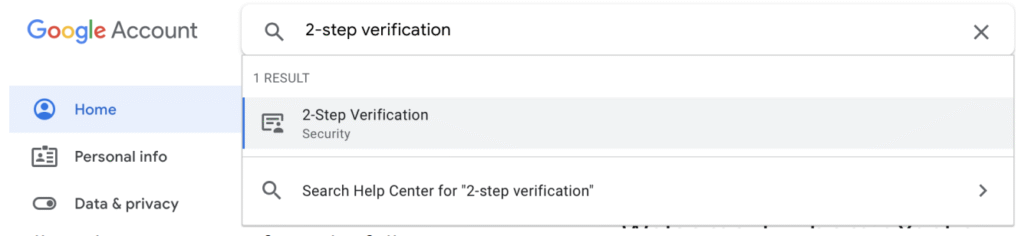
In order to use the service properly without using “Less secure apps”, a couple of activation steps should be taken. The first step would be activating the 2-Step verification on the Google account that will be used.
- Navigate to Manage your Google Account
- In the search bar type “2-step verification” and click the first option as shown on the image below:
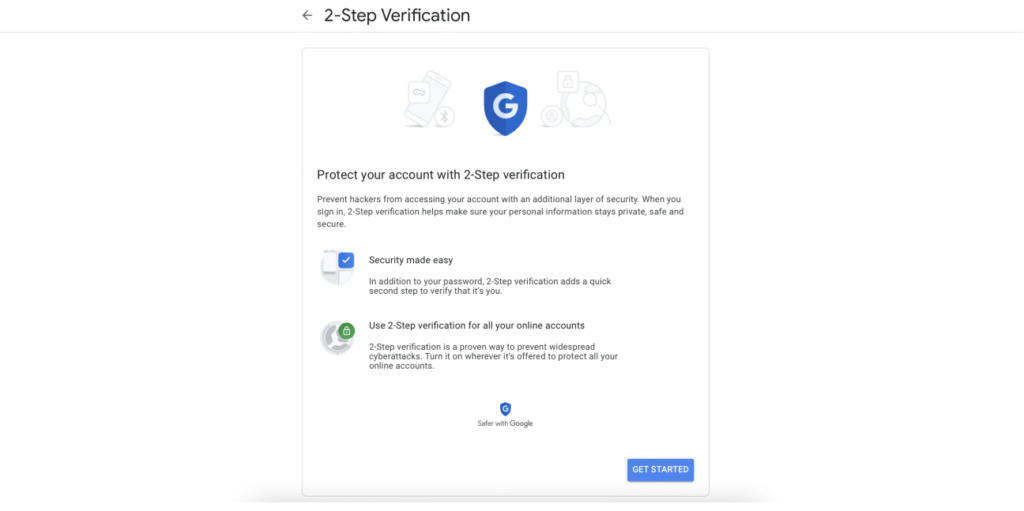
3. Follow the instructions from the following screen:
4. When the steps are successfully executed the following screen should be seen:

5. Click the “←” button next to the 2-Step Verification title.
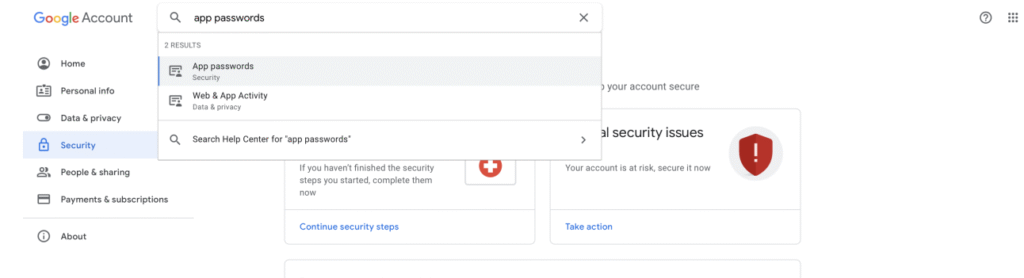
6. In the search bar type “app passwords” and click the first option as shown in the image below:
7. Select Other as shown in the image below:
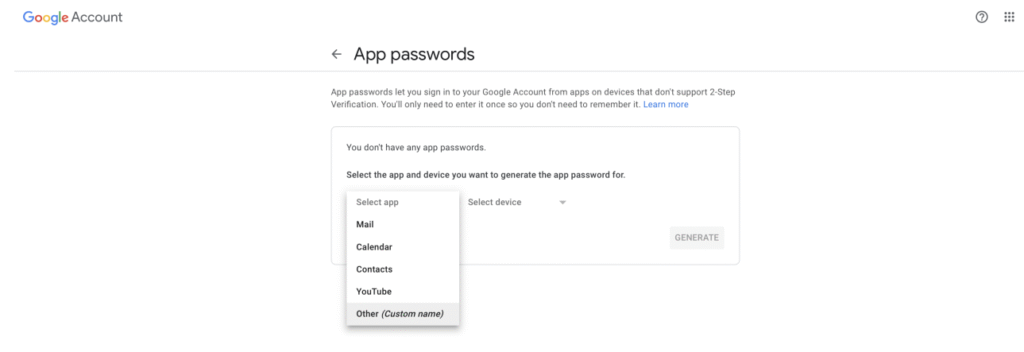
8. Enter LeadGiant and click Generate
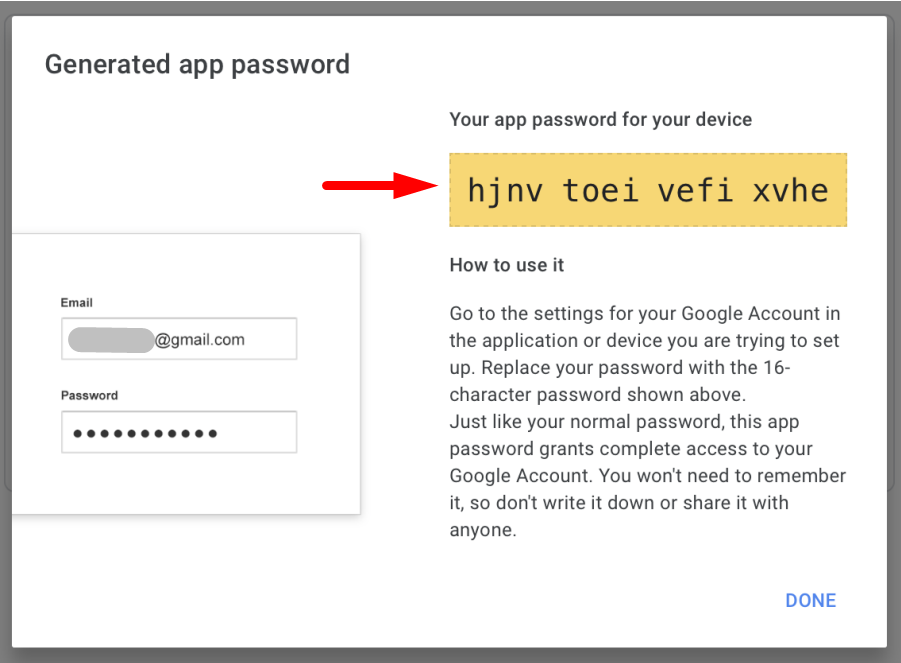
9. You will see a screen with the password for your app. Make sure to store the password somewhere because it is going to be used later.
LeadGiant setup
After the Google Setup is completed and the app password is present, the password should be set up also in LeadGiant.
1. Go back to the Email Integration section
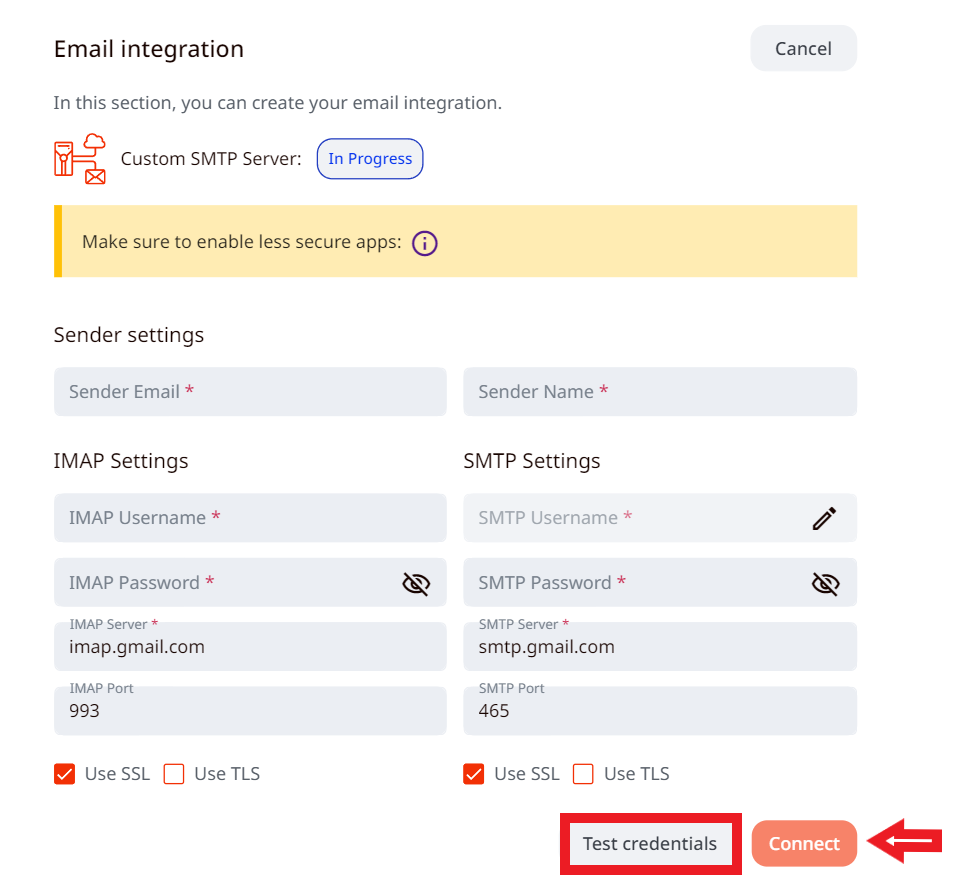
2. Just follow these recommendations to fill out the settings:
- Sender name: add your name
- IMAP username: add your Gmail address
- IMAP password: add your NEW Gmail password
- IMAP server: imap.gmail.com
- IMAP port (SSL): 993
- SMTP username: add Gmail address
- SMTP password: add your NEW Gmail password
- SMTP server: smtp.gmail.com
- SMTP port (SSL): 465
Once you filled it out make sure to click Test Credentials first and then Connect
The email is integrated to LeadGiant now, and you can start email outreach in a builder campaign!
👉 Outlook integration
If your Outlook account is using modern authentication, please follow the steps here to integrate it instead of following the ones below.
Outlook integration is more straight forward and no need to make any other additional settings within the Outlook account.
When you select to integrate outlook with LeadGiant, IMAP and SMTP server and port will be pre-populated, however, it should be:
- Sender email: your email address from which you will contact leads
- Sender name: your name
- IMAP username: add your Outlook address
- IMAP password: add your Outlook password
- IMAP server: outlook.office365.com
- IMAP port (SSL): 993
- SMTP username: add Outlook address
- SMTP password: add Outlook password
- SMTP server: smtp-mail.outlook.com
- SMTP port (TLS): 587
Once you filled out all the settings make sure to click Test Credentials first and then Connect.

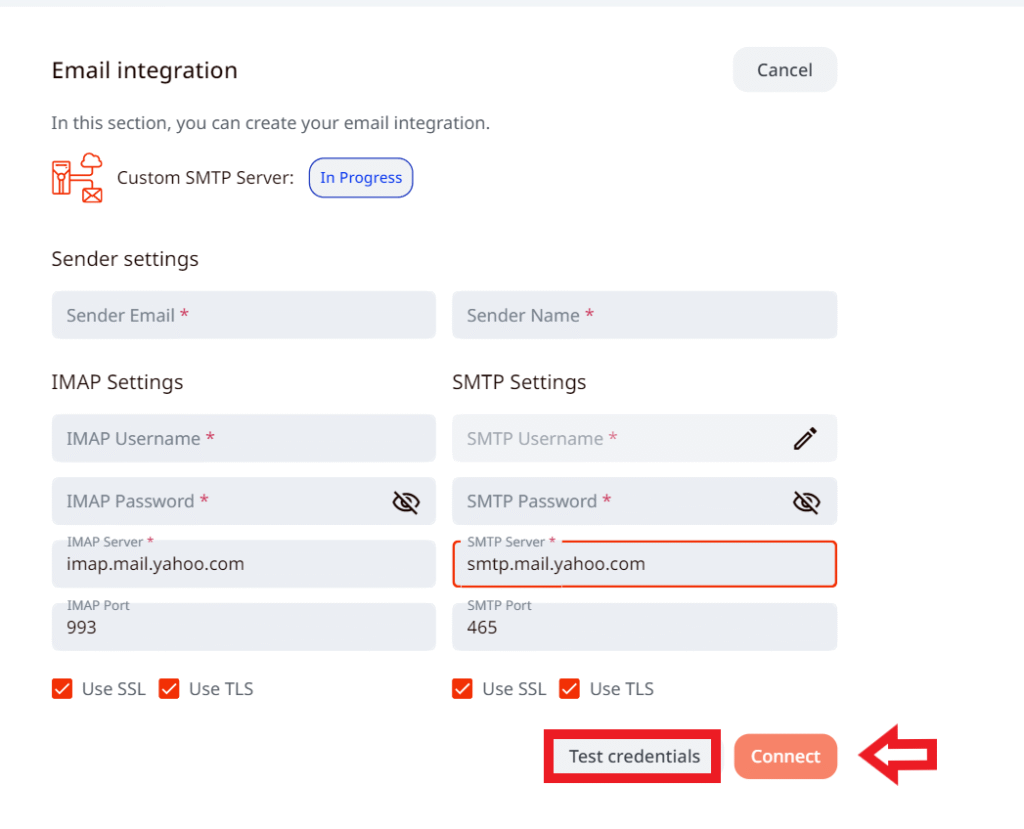
👉 Yahoo Integration
Yahoo integration is very similar to Outlook and all necessary data such as server and port are pre-populated by LeadGiant,
- Sender email: add your email address from which you will contact leads
- Sender name: add your name
- IMAP username: add your Yahoo address
- IMAP password: add your Yahoo password
- IMAP server: imap.yahoo.com
- IMAP port (SSL/TLS): 993
- SMTP username: add Yahoo address
- SMTP password: add Yahoo password
- SMTP server: smtp.yahoo.com
- SMTP port (SSL/TLS): 465
👉 Custom Email Integration
For custom email integration you would have to add all data yourself and it will not be auto-populated by LeadGiant.
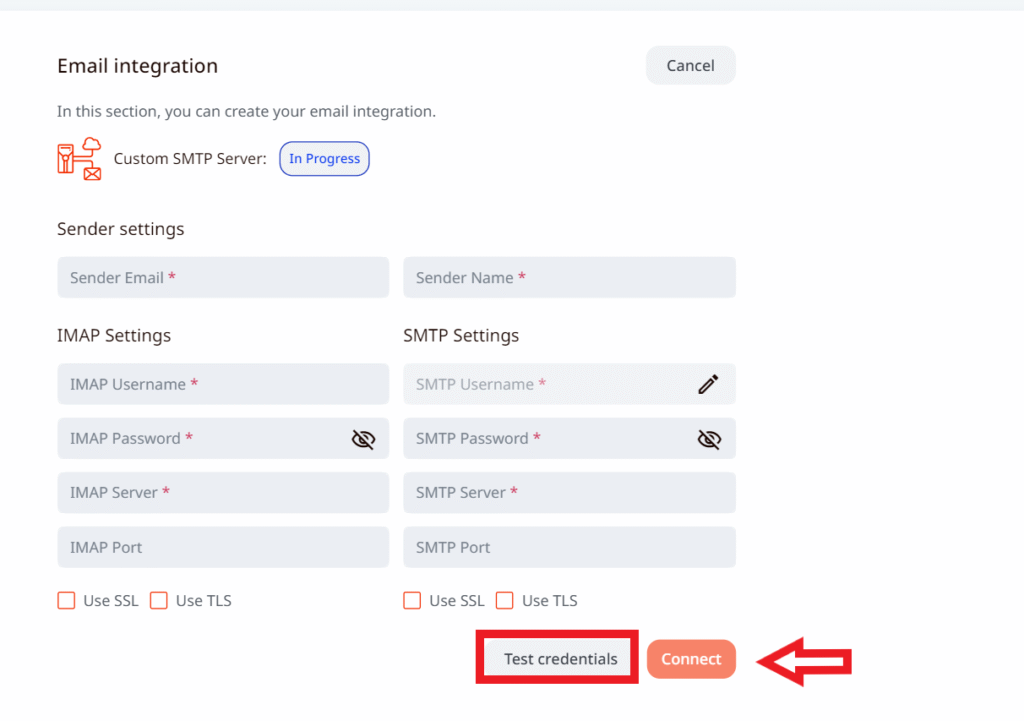
Remember to click Test credentials first before connecting!